Before the sortie
Stage 90 is a longer canyon with ten gates and five pursuit waves. Manage wind and health before reaching the guardian. Prepare for the next gate after a miss instead of attempting to turn back. The guardian transition restores 20 health up to your maximum, but that single recovery cannot compensate for repeated wall hits.
The new threat is a pair of vertical bands. One follows your sideways position when the warning begins; the other appears near one edge. Reading only the first and steering all the way across can lead into the second band or the wall. Find both before committing to a move.
- Gates
- 10
- Pursuit waves
- 5waves
- Time limit
- 197s
- Normal / enraged warning
- 1.15s / 1s
- Weak point open
- 2.82s
Standard settings before retry assistance; times are rounded. The first warning is 1.8 seconds in all three stages. Repeated failures can soften later warnings, so also read the live HUD.
Read the real warning
In this frame, the bands cover the centre and an area near the right edge. A marks an example in the clear space on the left. Moving right is not always impossible, but you must judge the gap between bands and the remaining space before the wall. Prefer an open area that is both wide enough and nearby.
The cross-section makes the second band’s reach visible. Changing height alone does not escape either vertical band. A later double attack can place the edge band on the other side: read its new position instead of memorising the left-hand destination in this screenshot.
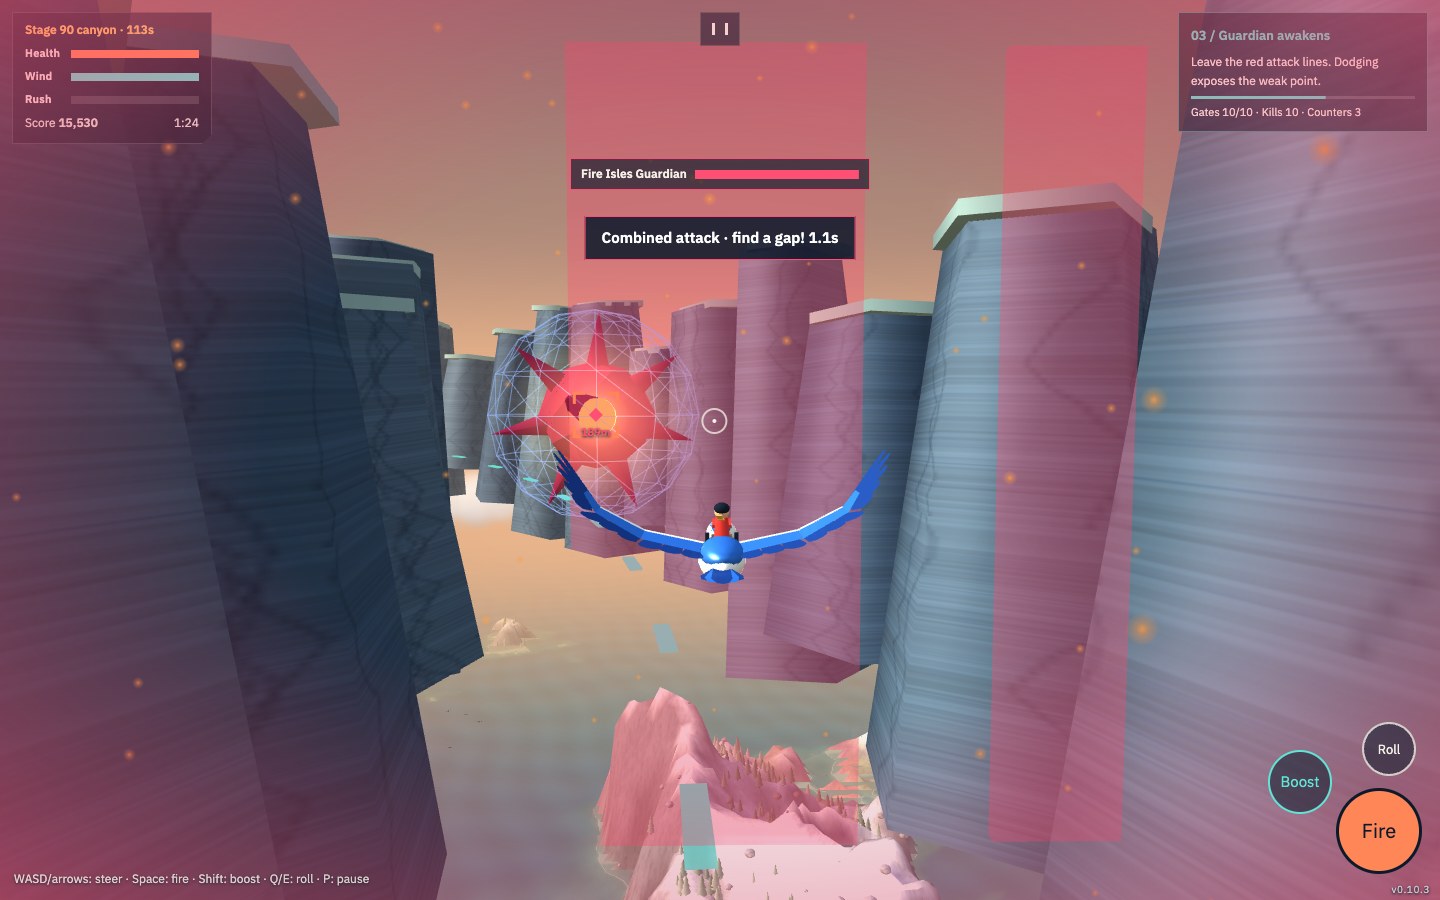
- Red bands: attack zones
- White dot: current position
- Teal A: one safe destination
From dodge to counterattack
- Locate the band covering your current position, then check the second band near an edge. Do not commit to a full-width move after seeing just one.
- Choose a sufficiently wide opening outside or between the two bands. A roomy nearby destination is more forgiving than a thin gap beside a wall.
- Release sideways input when you arrive. A roll also moves you sideways, so repeated rolls while already near an edge can carry you into the wall.
- The following attack may be horizontal or crossed. Read the number and orientation of the new bands instead of repeating the previous dodge direction.
Use the weak-point window
The standard weak-point window is about 2.82 seconds, shorter than at stages 30 and 60. A long escape followed by a long return costs valuable firing time. Keep clearance without excessive travel, then align the guardian with the reticle while the weak point is open. Accurate hits in each opening matter more than continuously firing at the shield.
Standard warnings last about 1.15 seconds and drop to about 1.00 second below half health. Boost does not increase sideways dodge speed, so holding it throughout the fight offers little help with these patterns. Reserve ten wind for a roll and check its cooldown. To open the weak point by rolling through danger, the roll must still be active at the attack instant.
Troubleshoot the last attempt
I dodged across and was hit again
Possible cause You escaped the first band but entered the second near the edge.
Next attempt Locate both bands before moving and release input at your chosen safe destination.
Changing height did not avoid the double attack
Possible cause Both warnings are vertical, so altitude alone does not clear them.
Next attempt Use sideways movement to find a space outside both vertical bands.
My dodge causes repeated wall damage
Possible cause You may be repeating sideways rolls while pressed against an edge.
Next attempt Leave room toward the centre and use a roll only when its timing and direction help.
The second half leads to hits or a timeout
Possible cause Shorter warnings or long returns after each dodge are consuming your margin.
Next attempt First stabilise survival with shorter moves, then increase accurate firing time in each open window.
Three checks for your next flight
- Read both vertical bands and the wall
- Stop sideways input at the safe destination
- Read horizontal and crossed warnings afresh
Canyon training is a separate mode for learning the basic dodge-and-counter rhythm. It does not let you select these stage-specific patterns. Practise the pattern here by replaying the corresponding unlocked campaign stage.
Ready for takeoff?
Game UI: English · Korean · Japanese · Chinese