Before the sortie
Stage 60 has eight gates and four pursuit waves before the guardian. You now need to read overlapping warnings as well as the separate horizontal and vertical patterns learned at stage 30. Practise adjusting both axes at the gates so diagonal movement is familiar before the boss fight.
If chasing a spirit carried you toward one side, check your escape room before the guardian arrives. The transition clears remaining pursuit spirits and their shots and restores 20 health up to the maximum. Release the large input used to chase the previous target and prepare to read a fresh warning.
- Gates
- 8
- Pursuit waves
- 4waves
- Time limit
- 185s
- Normal / enraged warning
- 1.23s / 1.08s
- Weak point open
- 3s
Standard settings before retry assistance; times are rounded. The first warning is 1.8 seconds in all three stages. Repeated failures can soften later warnings, so also read the live HUD.
Read the real warning
The dangerous area is the union of the horizontal and vertical bands, not just their intersection. Moving left out of the vertical band still leaves you exposed if you stay at the horizontal band’s height. Pick a clear quadrant such as A in the cross-section below.
Lower left is one safe option in this captured frame, not a permanent safe corner. Warnings use your position and height when they begin. If a wall or height limit leaves little room, choose a different open quadrant. Read the warning and decide on a destination before moving.
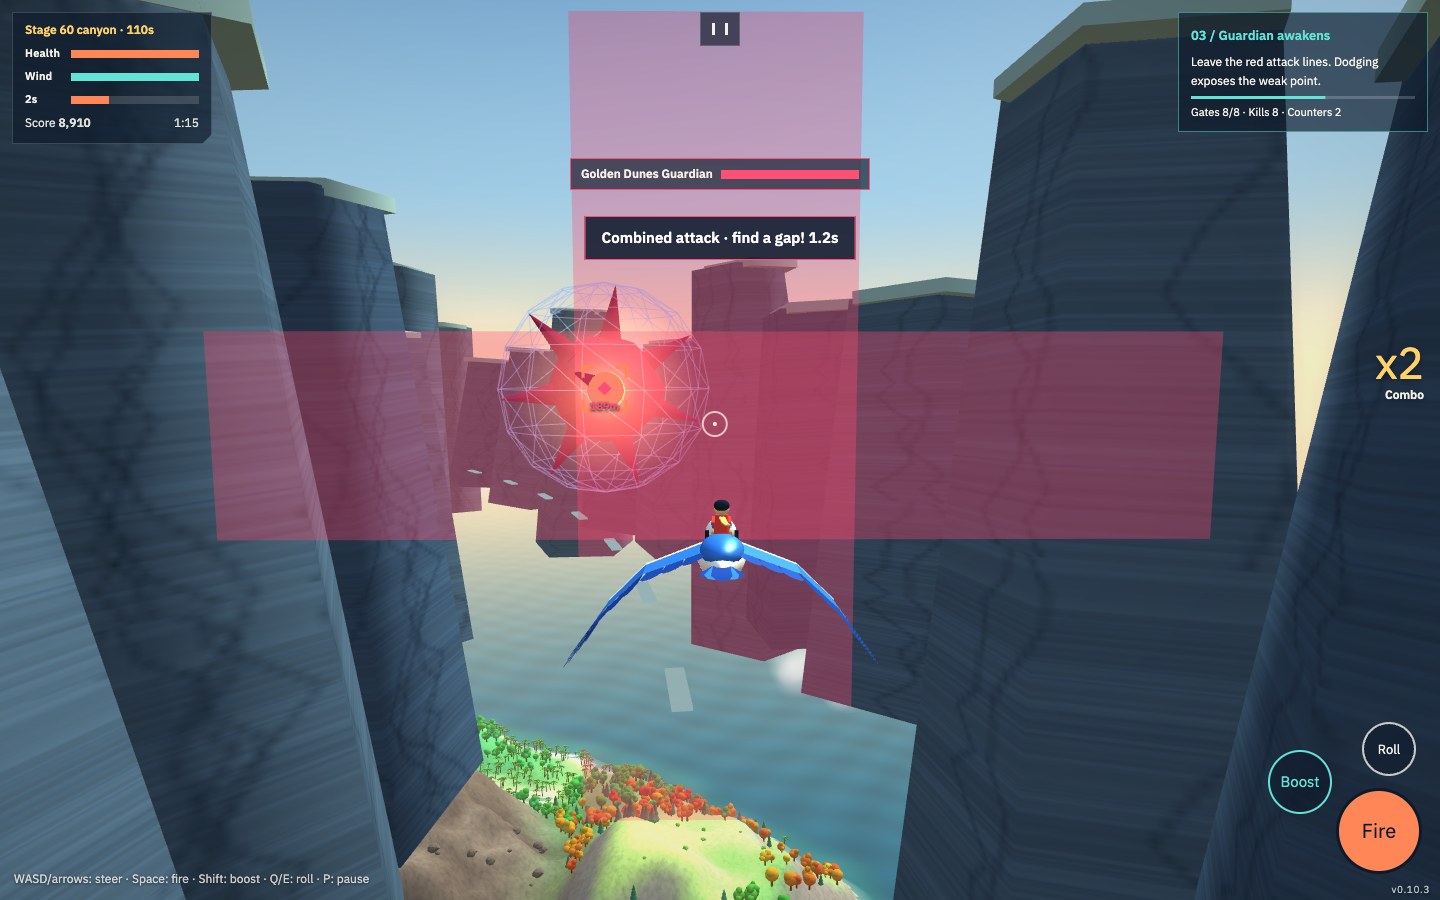
- Red bands: attack zones
- White dot: current position
- Teal A: one safe destination
From dodge to counterattack
- Find a nearby clear quadrant with room for the following attack. Avoid choosing a destination pressed against a wall merely because it is close.
- Apply sideways and vertical input together. Hold two direction keys on a keyboard, or drag diagonally in the left steering area on mobile.
- Check both conditions before releasing input: outside the vertical band, and sufficiently above or below the horizontal band.
- After the attack resolves and the weak point opens, regain your aim. Avoid a large automatic trip back to the centre; read the next warning and move only as far as needed.
Use the weak-point window
The standard open window is three seconds. Travelling too far into a clear quadrant spends much of that time correcting your aim. Once both bands are safely cleared, stop extending the dodge and use small adjustments to bring the guardian back near the reticle as the window begins.
Warnings last about 1.23 seconds normally and about 1.08 seconds below half health. Finishing a sideways move before starting a vertical move can leave too little time. Adjust both axes together when needed; if one is already safely clear, keep it there. Extra health can absorb an error but cannot satisfy the weak-point-opening condition.
Troubleshoot the last attempt
I left the centre of the cross but was hit
Possible cause You cleared the overlap while remaining in one of the bands.
Next attempt Check the horizontal and vertical conditions separately when choosing a destination.
My diagonal dodge ends against a wall
Possible cause You kept steering after reaching the clear quadrant.
Next attempt Ease off as soon as you have enough margin; practise short, deliberate movements.
The attack fires while I am still changing height
Possible cause Sequential adjustments used up the warning time.
Next attempt Begin both adjustments early, or keep an axis unchanged if it is already safe.
I dodge well but barely damage the guardian
Possible cause Your safe destination may be so far away that aiming consumes the open window.
Next attempt Leave clearance around the bands while reducing travel, then use the saved time for accurate hits.
Three checks for your next flight
- Clear the full area of both bands
- Stop after the diagonal move reaches safety
- Recover aim promptly within the three-second window
Canyon training is a separate mode for learning the basic dodge-and-counter rhythm. It does not let you select these stage-specific patterns. Practise the pattern here by replaying the corresponding unlocked campaign stage.
Ready for takeoff?
Game UI: English · Korean · Japanese · Chinese